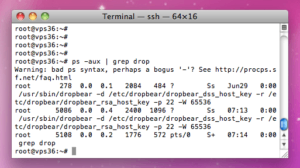
 OpenSSH is used on the majority of linux systems that require SSH access, however in comparison to some of the alternatives it can be quite resource intensive, it does also have some more features however most people are not even aware of these and have just installed it because of the convince. On systems with memory constraints replacing OpenSSH and installing drop-bear will actually save you a few MB of RAM. I have done this on the 128MB RAM web server that’s running this blog, click here to read more about that setup.
Removing SSH software from your system obviously comes with some risks, the biggest been that your probably connected over SSH to perform this change, this guide is designed so that you should be able to keep access to the server and safely install/remove the software. Please make sure you have a stable internet connection before doing this, I generally stay away from WiFi just encase your connection drop’s after the un-install.
First we will just install dropbear using apt-get, there is no point in installing it from source:
sudo apt-get install dropbear
Now we need to do some very basic configuration to dropbear, so open up the configuration file in a text editor.
sudo nano /etc/default/dropbear
Look for the line NO_START and replace with what’s below, once you have done that just hit ‘ctrl + x’ to exit and answer ‘y’ to saving the file (if you used nano that is):
NO_START=0
Next we can kill the current SSH server so the SSH port (22 TCP) isn’t already in use, you will NOT lose your SSH connection by running this command:
sudo /etc/init.d/ssh stop
Now we just need to start up our new SSH server, this should work as there is no longer the other SSH server running on port 22.
sudo /etc/init.d/dropbear start
Now it’s a good idea to test the new daemon and just make sure you can actually make a connection, so keep you current SSH connection open (if this doesn’t work that’s your only access to the server!) and just open a second SSH connection, make sure you can login and get to the root user account without any issues. If for any reason you can’t then just shutdown the dropbear server and start the ssh deamon again (opposite of the above commands).
Finally and only if the testing of the new SSH server worked 100% you can remove the old openssh-server, as we won’t be needing it anymore!
sudo apt-get remove openssh-server
Note: Ubuntu will probably need the 'sudo' infront of all these commands, if your on Debian you can probably just leave it off.


3 comments On How to Replace OpenSSH and install Dropbear
removing openssh isnt a good idea in my opinion, turning it off maybe a better choice
Worked great!
I had added a “banner” file but hadn’t yet created it before trying to start dropbear, and it failed to start, so make sure the files you specify exist before launching and it’s just as easy as this post makes it!
Thanks for shaving off more resource useage on my pi!
Thanks for good information on installing dropbear. What I really missed is more on configuration and key exchange to servers running openssh server.