
Cisco Router 887V - VPN Example Configuration
Overview
This is going to be a quick guide on how to setup VPN access on your Cisco router (in my case a Cisco 887 router with VDSL), for remote clients to access your network and get access to the local resources. There's a few different ways of doing this however we're going to use IPSec, mainly because it's more secure than the alternatives and doesn't require any third party clients to get it working (most of the time).
The guide will assume you've already got your LAN (VLAN1) and WAN (PPPoE/A on Dialer1) setup and working, also it assumes you have some Cisco knowledge to actually get the commands applied in the right places as I wont be covering the basics.
If you need a base configuration for a Cisco 887 look at the post here, otherwise jump straight into it below!
1) Enable Authentication
So the first part is to enable authentication on the router so that we can create users and have the VPN authenticate against these, you could also use an external radius server however if you've only got a few users this is going to be simpler to manage
aaa new-model
aaa session-id common

aaa authentication login default local
aaa authentication login vpn_xauth_ml_1 local
aaa authentication login sslvpn local
aaa authorization network vpn_group_ml_1 local

username vpn_username password 0 vpn_password
2) IP Address Pool
Next we need to create an IP pool that we'll use to give the VPN clients unique IP addresses that appear to be on the LAN (VLAN1), the second step is to ensure that we don't hand out these same IP's as part of the normal DHCP process.
ip local pool vpn_client_pool 192.168.0.100 192.168.0.109
ip dhcp excluded-address 192.168.0.100 192.168.0.109
3) Split Tunnel
Now normally when a client to connects to our VPN we want it to send all traffic to us for the LAN, there's usually no point in sending internet or DNS traffic to us if they already have an internet connection, we do that with an access list.
Basically the below is saying 'any' of the clients have access to '192.168.0.0/24', you should be able to modify to your specific requirements.
ip access-list extended vpn_resources
 permit ip 192.168.0.0 0.0.0.255 any
!
4) IPSec
IPsec uses two different phases for user authentication and traffic encryption, therefore we need to create two different policies. There are more secure settings than what I'm using in the policy below, however you're realistically going to have more compatibility problems as you tune up these, and the below are still very secure for most installs.
crypto isakmp policy 1
 encr 3des
 authentication pre-share
 group 2
!
crypto isakmp policy 2
 encr 3des
 hash md5
 authentication pre-share
 group 2
!
5) VPN Group
Now we need to define the group, the group name and group key that you pick here will need to be also entered on all of the clients that are using the VPN (laptops/iphones etc...), so you want to pick something secure but something that you also don't mind disclosing to people with VPN access.
In the below configuration my group is 'oracle' and we're using a shared password of 'qwerty', you should also notice this is where we're referencing the ip address pool that these clients will be given, and the access list that defines where they're allowed to go within our network 'vpn_resources'
(If you want to redirect the client's DNS queries you could also do that here with the 'dns' setting, however theres usually not much point in that unless you have some kind of intranet.)
crypto isakmp client configuration group oracle
 key qwerty
 pool vpn_client_pool
 acl vpn_resources
 max-users 10
!
[caption id="attachment_1626" align="alignleft" width="300"]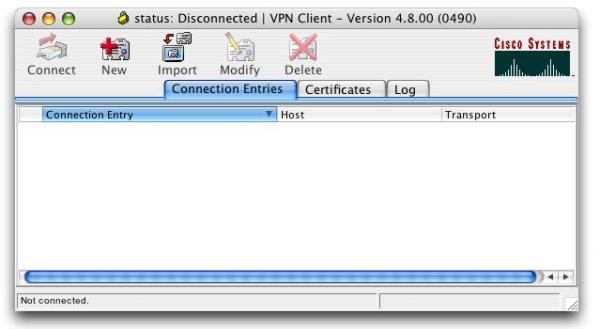 OSX Cisco VPN Client[/caption]
So the above configuration was mostly for Phase 1 (ISAKMP) of the tunnel, really this is concerned with securely authenticating the users and defining how were going to configure them on the network once they're connected.
Naturally that brings us onto Phase 2 (IPSec), which is how the already authenticated users are going to securely encrypt there traffic between the router and client. First we'll setup a transform set and bind that to an IPSec profile
crypto ipsec transform-set vpn_transform esp-3des esp-sha-hmac
!
crypto ipsec profile vpn_profile
 set transform-set vpn_transform
!
6) Virtual Tunnel
Now we need somewhere on the router that clients can actually bind there internal IP to, for example the ip route and ARP table on the router needs to know where to send that traffic, this is a 'virtual-template'. The configuration is simply saying our virtual-template2 is part of the IPSec profile we just created and is on the VLAN1 internal network.
interface Virtual-Template2 type tunnel
 ip unnumbered Vlan1
 tunnel mode ipsec ipv4
 tunnel protection ipsec profile vpn_profile
!
Now the last part should be to glue our VPN group, how we want to authenticate users and virtual template configuration together using the ISAKMP profile.
crypto isakmp profile vpn_ike_profile
   match identity group oracle
   client authentication list vpn_xauth_ml_1
   isakmp authorization list vpn_group_ml_1
   client configuration address respond
   virtual-template 2
!
7) Testing Clients
The final step is to go over to one of your clients and actually try the VPN connection, below are the five bits of information that these clients will require a minimum, most will dynamically pick up the rest of the required information.
Clients like an iPhone (shown at the right) have a built in client, however if yours doesn't go over to the cisco website and download the 'Cisco VPN Client', it's currently available for most operating systems like Windows, Linux, OSX and Solaris.
- Public IP or DNS Name - vDSL Dialer1 Public IP
- Group Name - oracle
- Group Pass - qwerty
- User - vpn_username
- Pass - vpn_password