Automatically Deploy C# ASP .NET 6.0 Core Applications to Ubuntu using Github Actions CI/CD, with NGINX and MySQL
C# .NET Core is a highly performant programming language created by Microsoft, which is an evolution of the legacy .NET Framework. Notably the latest version now natively supports operating systems other than Windows, such as Linux or MACOS making it much more widely adopted.
Within this guide we'll go through the following steps, feel free to complete all if it's a fresh setup, or just pick the bits that suit what you're trying to achieve:
- Create a Ubuntu Virtual Machine
- Install the .NET Core Runtime
- Setup Nginx as a Web Server
- Optionally install MySQL Database
- Create GitHub Actions for CI/CD
1 - Create Virtual Machine.
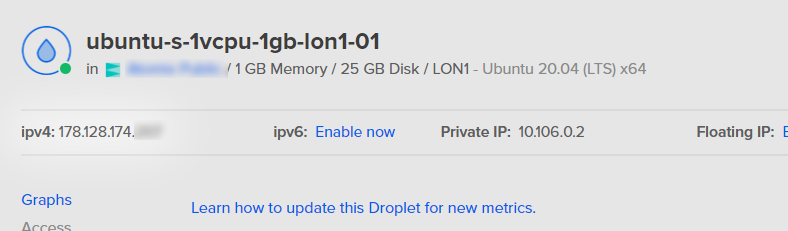
To begin we create a Virtual Machine on the Internet which will host our application - We are using Digital Ocean in this example, however any other provider with a similar specification should work just as well. When creating the droplet within Digital Ocean we've gone for the smallest Virtual Machine available:
- Distribution - Ubuntu 20.04 (LTS) x64
- Plan - Shared CPU, Basic - $5/pm (1GB RAM, 1 vCPU, 25GB Disk)
- Authentication - SSH Keys. You must use SSH keys and not password authentication to perform the later CI/CD integration with GitHub.
If you are following along then the same specification should be fine too, however websites with higher traffic may need to consider an increase of the CPU/RAM - This is fairly trivial to upgrade later on once you are setup, so don't worry about starting with this amount.
Once the Droplet has finished building you should see it's Public IP address which you should now be able to SSH to, remember that you'll need to connect using the SSH Key provided when building the Virtual Machine.
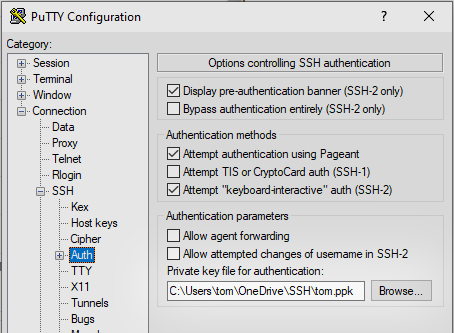
When using PuTTY on Windows the key file is set within Connection > SSH > Auth and select it within the "Private key file for authentication" field. Also, once you connect the Password prompt is to decrypt the key file, it is not for the user of the remote machine.
To begin with we will ensure the image we have is the most up-to-date by running the update and upgrade commands.
apt update -y
apt upgrade -y
2 - Setup .NET Core Runtimes on Ubuntu and Setup Service
Now we need to let Ubuntu know about the Microsoft repository for Ubuntu, which once registered we should be able to download the latest .NET SDK's from - To do that we issue these commands in our SSH window:
cd ~
wget -q https://packages.microsoft.com/config/ubuntu/20.04/packages-microsoft-prod.deb
sudo dpkg -i packages-microsoft-prod.deb
sudo add-apt-repository universe
Now the repository is setup we should be able to install some prerequisites, and then also the actual .NET 6.0 SDK
sudo apt install apt-transport-https -y
sudo apt update -y
sudo apt install dotnet-sdk-6.0 -y
So that's actually all that needs to be done for getting .NET Core running on an Ubuntu server, next we'll setup a Webserver so that we can accept HTTP requests from clients, and forward them onto our application.
Now we need to create a file that will define our service, so Ubuntu knows how to start/stop the service on our request, at boot and when we want to deploy the service - The "yourservicename" should be replaced with what ever makes sense for your application.
You will also see that we reference a folder in the "/var/www/" directory that is not yet created, this is where our application will live - Again change the "your_domain" to something that makes sense, but don't worry that this folder doesn't exist yet, we'll create that when installing Nginx.
sudo nano /etc/systemd/system/yourservicename.service
[Unit]
Description=YourServiceNameWeb

[Service]
WorkingDirectory=/var/www/your_domain
ExecStart=/usr/bin/dotnet /var/www/your_domain/DemoApplication.dll
Restart=always
RestartSec=10
SyslogIdentifier=YourServiceNameWeb
User=www-data
Environment=ASPNETCORE_ENVIRONMENT=Production
Environment=DOTNET_PRINT_TELEMETRY_MESSAGE=false

[Install]
WantedBy=multi-user.target
Within the above you will want to edit the following elements to match your environment
- Description - Call this anything logical, typically I copy the name of the service
- WorkingDirectory - Should be the folder you created before, that will house your application
- SyslogIdentifier - I would match the service name again
- User - Should be the local Linux user that you want to run the application, I normally match that of Nginx which uses www-data, it should not be "root"
Finally we want to ensure that if the server ever reboots our service will automatically restart, that is done with the below command - Again replacing the "yourservicename" with what ever you called the above file, before the ".service"
sudo systemctl enable yourservicename
3 - Setup the NGINX Web Server for .NET Core
Here we will install NGINX which is our web server, but we will also install Certbox on the server, this will allow us to automagically request an SSL Certificate from LetsEncrypt (for Free), and it'll then update our Web Server configuration to use the newly created certificate - Gone are the days where we need to pay for SSL certificates, and where the whole process of requesting and installing was a complete pain!
sudo apt install nginx certbot python3-certbot-nginx -y
You should find that NGINX is now actually already running on the server, if you run the following command you should see a running status in the output:
systemctl status nginx
nginx.service - A high performance web server and a reverse proxy server
     Loaded: loaded (/lib/systemd/system/nginx.service; enabled; vendor preset: enabled)
     Active: active (running) since Thu 2021-11-11 13:36:43 UTC; 4min 34s ago
       Docs: man:nginx(8)
   Main PID: 27882 (nginx)
      Tasks: 2 (limit: 1136)
     Memory: 3.8M
     CGroup: /system.slice/nginx.service
             ??27882 nginx: master process /usr/sbin/nginx -g daemon on; master_process on;
             ??27884 nginx: worker process
Also if you open a browser on your local machine such as chrome, you should find that if you go to http://server_ip - Where server_ip is the IP Address that you SSH'ed to, you should get an NGINX welcome page.
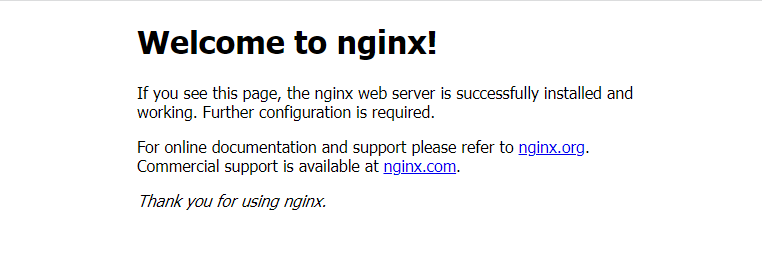
Welcome to NGINX page after installation
We also now want to run the below command to ensure that if the server reboots for any reason, the system knows that we want Nginx to be automatically started without any manual intervention
sudo systemctl enable nginx
Now we need a place to store our application which will be in the /var/www folder which Nginx will have just created - So use mkdir to create a directory on the server, replacing "your_domain" which what you want the folder to be called.
sudo mkdir /var/www/your_domain
Next we will create a new file within the Nginx sites enabled directory, this can be called anything but it makes sense to match it with the directory that you created within the "/var/www/" folder, within that we'll paste in the block below, ensuring that you update "yourdomain" to your actual domain name.
nano /etc/nginx/sites-enabled/yourdomain
server {

        root /var/www/yourdomain/;

        index index.html index.htm index.nginx-debian.html;

        server_name yourdomain.com;

        location / {
                proxy_pass http://localhost:5000;
                proxy_http_version 1.1;
                proxy_set_header Upgrade $http_upgrade;
                proxy_set_header Connection keep-alive;
                proxy_set_header Host $host;
                proxy_cache_bypass $http_upgrade;
                proxy_set_header X-Forwarded-For $proxy_add_x_forwarded_for;
                proxy_set_header X-Forwarded-Proto $scheme;
        }

}
Now we should be able to restart Nginx to apply our new configuration.
sudo systemctl restart nginx
At this point I will normally browse to "yourdomain.com" just to make sure you see an Nginx page, however it should be a "502 Bad Gateway" response as our .Net Core application is not yet actually installed on the server for Nginx to pass the request back to.
4 - Setup MySQL on Ubuntu 20.04 (Optional)
So not all applications will require a database, and even if you have a database it could well be something different such as Postgres or MongoDB - However if you are using MySQL as your database, you can follow this set to get it installed on Ubuntu as a service.
Firstly we need to add the MySQL repository to our server, so that we're able to use APT to install the MySQL packages rather than having to build from source - You probably want to get the latest version of MySQL rather than the one below, you can do this by going here - Then click the download button, on the next page right click on the "no thanks, just start my download" link, and copy the link address, this you can replace with the URL we WGET below.
Now we will move into the temp directory, and download the files:
cd /tmp
wget https://dev.mysql.com/get/mysql-apt-config_0.8.20-1_all.deb
sudo dpkg -i mysql-apt-config*
sudo apt update
rm mysql-apt-config*
Now we have the package downloaded and installed we should be able to install the MySQL server via APT - Follow through the wizard that this pops up.
sudo apt install mysql-server -y
Now we want to ensure that MySQL is running as it should have automatically started once the install was complete, if it was you'll see a running output similar to below.
sudo systemctl status mysql
mysql.service - MySQL Community Server
     Loaded: loaded (/lib/systemd/system/mysql.service; enabled; vendor preset: enabled)
     Active: active (running) since Thu 2021-11-11 15:24:23 UTC; 15s ago
       Docs: man:mysqld(8)
             http://dev.mysql.com/doc/refman/en/using-systemd.html
    Process: 30003 ExecStartPre=/usr/share/mysql-8.0/mysql-systemd-start pre (code=exited, status=0/SUCCESS)
   Main PID: 30052 (mysqld)
     Status: "Server is operational"
      Tasks: 38 (limit: 1136)
     Memory: 360.0M
     CGroup: /system.slice/mysql.service
             ??30052 /usr/sbin/mysqld
Then we need to ensure that the MySQL Service is set to enabled, so that in the event of a server reboot the MySQL service will be automatically started. We also follow this up with the secure install command, which will take you through a few steps to clean-up the install and keep things secure.
sudo systemctl enable mysql
mysql_secure_installation
Finally check you can login using your root user
mysql -u root -p
5 - Github .NET Core Automated Deployments CI/CD
Create GitHub Secrets
Login to GitHub, navigate to your project, click secrets, and create the following:
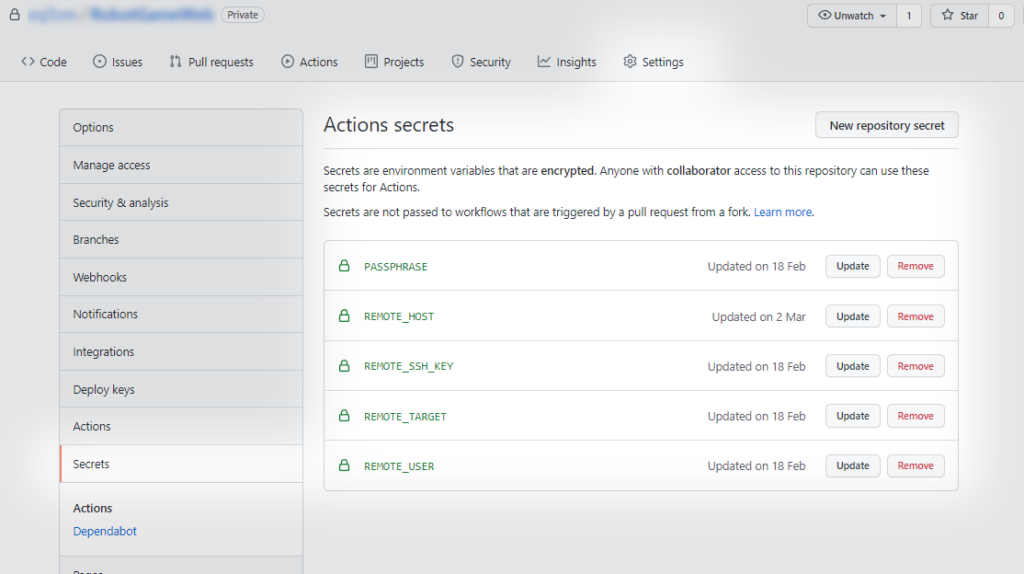
- REMOTE_HOST - IP Address (or Hostname) of your VM
- REMOTE_USER - User (such as root) that you wish to login as
- REMOTE_SSH_KEY - The SSH Key file that you login to your VM with
- PASSPHRASE - The Password that protects the SSH Key file
- REMOTE_TARGET - The directory on the VM where your files should be copied to
Create Github Actions / Workflow Template
So at this point we have a Web Server (Nginx) pointing to our Service (.Net Core) and if needed for your application we also have a Database (MySQL) installed on the same server, now all we need to do is get the application built and installed on the server.
What we're using for this is Github actions, basically every time that we check code into Github it will automagically build the application, and copy the resulting files to our server and restart the service as needed, this is continuous deployment - You can also have Github run other tasks such as Unit tests on your code during the deployment, to ensure it's working and safe.
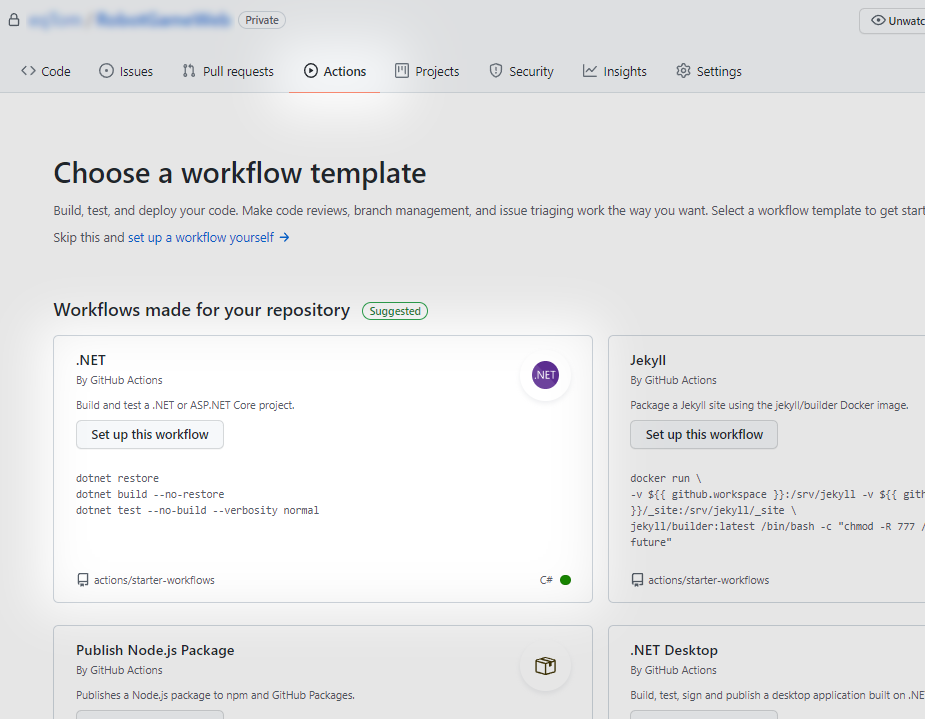
So login to Github and go over to the Actions tab on your repository and create a new work flow - There is a .NET workflow which you can select, or even just the "setup a workflow yourself" will do, as the full script you need is given in detail below.
Now you'll see a text editor window, all the contents within this can be replaced with the following, however before you save there are a few changes that you need to make:
- Where you see "ServiceName" this needs to be replaced with the name of the service created earlier.
- Within the SCP Copy command you'll see a Path, this path will be dependant on your application, and where it saves the binaries on a build. I normally take a best guess at it, then look in the GitHub action logs to see where it was actually saved, then update the actions file to match this. You can work it out, but this just seems easier.
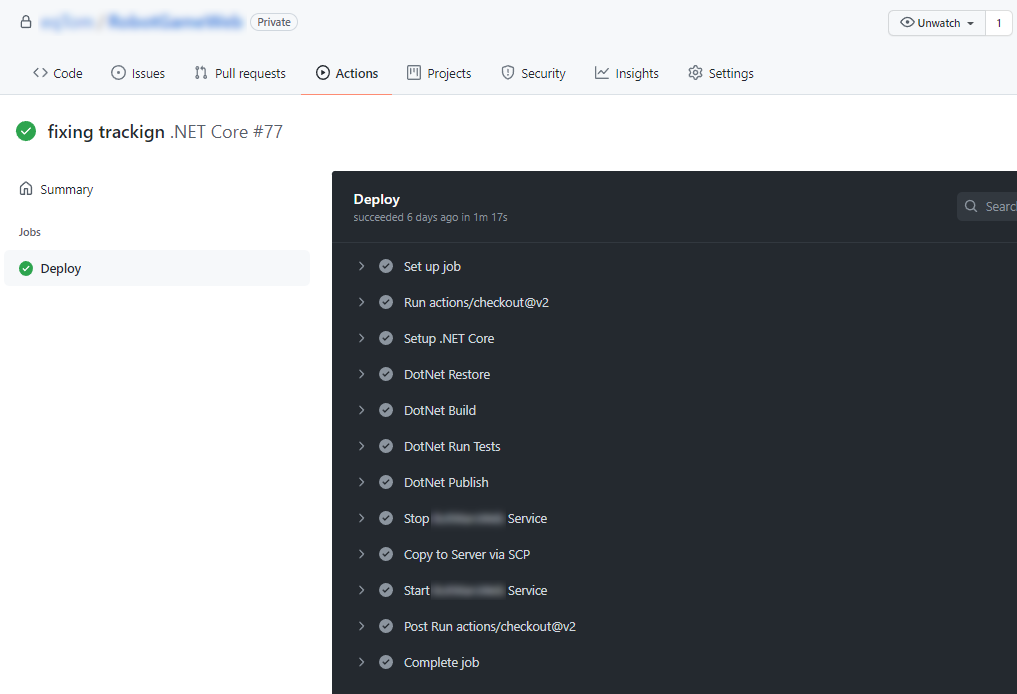
The script has the following stages
- Checkout the latest code from "master"
- Perform a Dotnet Restore, Build, Run Tests and Publish
- Stop the service on the remote VM, so avoid issues (this is service affecting)
- SCP Copy the Published files from GitHub's build server to our live server
- Start the service on the remote VM with the new application in place
The script is as follows:
name: .NET Core

on:
  push:
    branches: [ master ]
  pull_request:
    branches: [ master ]

jobs:
  Deploy:

    runs-on: ubuntu-latest

    steps:
    - uses: actions/checkout@v2
    - name: Setup .NET Core
      uses: actions/setup-dotnet@v1
      with:
        dotnet-version: 6.0.x

    - name: DotNet Restore
      run: dotnet restore

    - name: DotNet Build
      run: dotnet build --no-restore

    - name: DotNet Run Tests
      run: dotnet test --no-build --verbosity normal

    - name: DotNet Publish
      run: dotnet publish -c Release

    - name: Stop ServiceName Service
      uses: garygrossgarten/github-action-ssh@v0.6.3
      with:
        command: service ServiceName stop
        host: ${{ secrets.REMOTE_HOST }}
        username: ${{ secrets.REMOTE_USER }}
        passphrase: ${{ secrets.PASSPHRASE }}
        privateKey: ${{ secrets.REMOTE_SSH_KEY }}

    - name: Copy to Server via SCP
      uses: garygrossgarten/github-action-scp@release
      with:
        local: /home/runner/work/DemoApp/DemoApp/DemoApp/bin/Release/net5.0/publish/
        concurrency: 10
        remote: ${{ secrets.REMOTE_TARGET }}
        host: ${{ secrets.REMOTE_HOST }}
        username: ${{ secrets.REMOTE_USER }}
        passphrase: ${{ secrets.PASSPHRASE }}
        privateKey: ${{ secrets.REMOTE_SSH_KEY }}
      env:
        ASPNETCORE_ENVIRONMENT: Production

    - name: Start ServiceName Service
      uses: garygrossgarten/github-action-ssh@v0.6.3
      with:
        command: service ServiceName start
        host: ${{ secrets.REMOTE_HOST }}
        username: ${{ secrets.REMOTE_USER }}
        passphrase: ${{ secrets.PASSPHRASE }}
        privateKey: ${{ secrets.REMOTE_SSH_KEY }}
Once you are ready click "Commit" that will save this file via a GIT Commit into your repository - As this is just like any other "Commit" on this repository Github will actually automatically trigger the action you just created and run through the workflow, meaning this is a great way to test if your script is working.
So that's all we need, any future commit such as from your IDE or Code Editor to the "master" branch will also run the same actions, which automatically build and deploy your application. I would suggest on the first few watching through the log to resolve any errors that could arise.
If you have any questions pop them in the comments below, and I'll do my best to help answer them!